여러가지 방법이 있었다


yum clean all 이걸로 한방에 해결보는 사람도 있었는데


나는 일단 아니였고 ..


mv /var/lib/rpm/__db* /tmp

rpm --rebuilddb


이걸로 해결보는사람도 있었는데 물론 난 아니였고 ^^


yum clean dbcache
yum history new


결국 이 두개 조합으로 해결했다


후후 ..


https://forums.fedoraforum.org/showthread.php?260195-Problem-with-yum-Error-database-disk-image-is-malformed


Problem with yum; Error: database disk image is malformed

Re: Problem with yum; Error: database disk image is malformed Wooow, such an old thread and it helped me perfectly!! Thanks guys for all the tips!! I think, therefor I am, I think....

forums.fedoraforum.org


아 .. AMD랑 VM이랑 뭐가 있는건지 intel에서 쓸때랑 뭔가 너무 다른것같다 ...


ㅡㅡ ...


아무튼


Entering emergency mode. Exit the shell to continue... 어쩌구 저쩌구로


비상 쉘이나오면


아래의 명령어입력 후

xfs_repair -v -L /dev/dm-0


Ctrl-Alt-Delete 로 재부팅하면 잘 실행된다


https://forums.centos.org/viewtopic.php?t=73689&p=310322


How to fix "Entering emergency mode. Exit the shell to continue." - CentOS

General support questions marbenoct2019 Posts: 8 Joined: 2019/10/19 11:18:28 Post by marbenoct2019 » 2020/03/11 00:32:36 Hi All, There is a brownout here while my centos7 is power on. When I reboot my centos 7, it won't boot normally. The error message is

forums.centos.org


1. proxy.conf 파일 생성

sudo touch /etc/apt/apt.conf.d/proxy.conf


2. proxy.conf 파일에 다음 내용으로 프록시 설정

Acquire::http::Proxy "http://user:password@proxy.server:port/";


https://www.serverlab.ca/tutorials/linux/administration-linux/how-to-set-the-proxy-for-apt-for-ubuntu-18-04/


How to Set the Proxy for APT on Ubuntu 18.04 - Serverlab

Learn how to set APT proxy settings on Ubuntu Server to allow packages from remote repositories to be installed and updated when behind a proxy server.

www.serverlab.ca


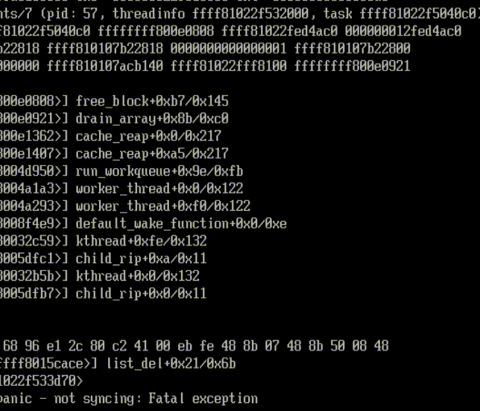
뭐지 ..


이번에 pc 바꾸고 linux 올릴려니까


자꾸 centos7 설치할때


kernel panic not syncing fatal exception으로 부팅에 실패했다 .. 


뭐 대충 이런 ..?


진짜 뭐지 약간 갑분싸였다가


구글링으로 답을 얻을 수 있었다.


virtualbox 버전 종특인지 cpu intel 9세대 종특인지는 모르겠으나


나같은경우는 6.0.6으로 새로 설치했을때 정상 동작했다 ...


너무 어이없는 경험쓰


참고 : https://forums.virtualbox.org/viewtopic.php?f=3&t=93990


나같은 경우는 jenkins 설치 후 jenkins로 유저 변경하려는데


su - jenkins


이 명령어를 입력해도 아무런 반응이 없었다


google신에게서 답을 찾았는데

vi /etc/passwd

위 파일을 확인해서 jenkins가 /bin/false로 되어 있다면 로그인이 불가능한 계정이다


/bin/false의 뜻은 아래와 같다

...더보기

/bin/false 

allows a login, but no shell, no ssh tunnels and no home directory.

-> 시스템의 로그인은 불가능, FTP 서버 프로그램같은 프로그램도 불가능하다.

쉘이나 ssh과 같은 터널링(원격접속) 그리고 홈디렉토리를 사용할 수 없다.


이게 어떤식으로 동작이 되는지 아직 리눅스에 대해서 잘 모르지만 우회하는 방법이 있는듯하다.

su - username -s /bin/sh

위 명령어를 실행 후 whoami를 실행하면 우리가 원하던 계정으로 로그인 한 것을 확인할 수 있다.


출처 : http://faq.hostway.co.kr/Linux_ETC/1624

출처 : https://unix.stackexchange.com/questions/39314/su-does-not-change-user-but-does-not-respond-with-an-error-either


나같은사람이 모를 수 있다.


mvn 명령어를 사용할 경우 JAVA_HOME을 따로 지정해줘야 하는 경우가 생길 수 있다 


나같은경우는 연습하는 리눅스 서버를 재가동했더니 아래 에러가 나왔다


The JAVA_HOME environment variable is not defined correctly
This environment variable is needed to run this program
NB: JAVA_HOME should point to a JDK not a JRE


java의 심볼릭링크가 jre경로로 되어있어서 바꿔줘도 결과가 똑같았다


아래는 해결


vi /etc/mavenrc 파일을 새로 생성하여


JAVA_HOME=여러분들의 jdk가 들어있는 home 디렉토리


를 입력하고 저장 후


다시 mvn 명령어를 사용하면 된다.


주의할점은 /bin 디렉토리는 포함하면 안되는 것 같다 딱 /bin 경로가 있는 root경로까지만 추가후 


mvn 명령어를 실행 해보자


출처 : https://magicps.tistory.com/1768


nohup 종료방법
1. “ps -ef | grep 쉘스크립트파일명” 명령으로 데몬형식으로 실행
2. "kill -9 PID번호“ 명령으로 해당 프로세스 종료


http://egloos.zum.com/antamis/v/678228

http://egloos.zum.com/antamis/v/678228

http://egloos.zum.com/antamis/v/678228


http://wangin9.tistory.com/entry/vbox-centos7-memory

http://wangin9.tistory.com/entry/vbox-centos7-memory

http://wangin9.tistory.com/entry/vbox-centos7-memory


VBOX_E_NOT_SUPPORTED 대응 


https://m.blog.naver.com/PostView.nhn?blogId=r2adne&logNo=220239005520&proxyReferer=https%3A%2F%2Fwww.google.com%2F

https://m.blog.naver.com/PostView.nhn?blogId=r2adne&logNo=220239005520&proxyReferer=https%3A%2F%2Fwww.google.com%2F

https://m.blog.naver.com/PostView.nhn?blogId=r2adne&logNo=220239005520&proxyReferer=https%3A%2F%2Fwww.google.com%2F


+ Recent posts